IP Camera Network Setup: Complete Configuration Guide
IP camera network setup has become essential for modern security systems, offering high-definition video, remote access, and intelligent features. Whether you’re installing cameras at home or in a business environment, this complete guide covers everything from planning to configuration and troubleshooting.
Setting up networked surveillance cameras differs significantly from analog CCTV systems. First, you need to understand networking fundamentals including IP addresses, subnets, and bandwidth. Moreover, proper planning ensures reliable performance and easy expansion. Therefore, this guide walks you through every step for optimal results.
For comprehensive security camera solutions, explore various options. Additionally, review our CCTV camera selection guide for weather-appropriate choices in Indian conditions.
Understanding Networked Camera Systems
Networked surveillance involves connecting cameras to your local network (LAN) or the internet. First, each camera receives a unique IP address for identification. Then, cameras transmit video data as digital packets over Ethernet cables or WiFi. Finally, you access footage through dedicated software, web browsers, or mobile apps.
Additionally, networked surveillance offers advantages over analog systems including higher resolution (1080p to 4K), remote accessibility from anywhere, advanced features (motion detection, analytics), scalable expansion, and easier installation with PoE technology.
Learn about network security fundamentals before starting your installation to ensure proper protection.
Pre-Installation Network Planning
Calculate Bandwidth Requirements
Proper planning starts with bandwidth calculation. First, determine per-camera bandwidth: 1080p camera uses 2-4 Mbps, 4MP camera uses 4-8 Mbps, and 4K camera uses 12-20 Mbps (depending on compression).
Example Calculation for 8 cameras:
- 4 cameras at 1080p: 4 × 3 Mbps = 12 Mbps
- 4 cameras at 4MP: 4 × 6 Mbps = 24 Mbps
- Total: 36 Mbps + 20% buffer = 43 Mbps minimum
Therefore, ensure your network switch and internet connection support this bandwidth during installation.
Choose Network Architecture
When planning your surveillance system, select the appropriate architecture:
Standalone Network: Dedicated network exclusively for cameras. Moreover, this provides maximum security and prevents bandwidth conflicts. Additionally, ideal for large installations with 10+ cameras.
Shared Network: Cameras share existing business/home network. However, requires proper VLAN configuration to isolate camera traffic. Furthermore, suitable for small installations (under 10 cameras).
Cloud-Based: Cameras connect directly to cloud services. Consequently, easier remote access but depends on internet reliability. Therefore, best for small installations prioritizing remote access.
For related infrastructure, check our PoE switch installation guide for powering cameras efficiently.
Essential Equipment for Surveillance Systems
IP Cameras
Select cameras based on resolution requirements, indoor vs outdoor installation, fixed or PTZ (pan-tilt-zoom) functionality, and PoE support for simplified installation. Additionally, ensure weatherproof ratings (IP66+) for outdoor cameras in Indian weather.
Visit CP Plus IP cameras for quality options.
Network Video Recorder (NVR)
NVRs store and manage footage in surveillance installations. First, choose NVR supporting adequate camera channels (4, 8, 16, 32+). Then, ensure sufficient storage capacity (2-8 TB minimum). Additionally, verify PoE ports if powering cameras through NVR.
Network Switch
For installations without NVR PoE, use dedicated switches. First, calculate required PoE budget (15-30W per camera). Then, ensure gigabit speeds for high-resolution cameras. Moreover, managed switches allow VLAN configuration for security.
Explore networking equipment options for reliable switches.
Ethernet Cables
Use Cat5e minimum, Cat6 recommended for installations. Additionally, maximum cable run is 100 meters for PoE functionality. Furthermore, outdoor-rated cables for external installations withstand weather exposure.
Storage Solutions
Plan storage based on retention needs:
- Local storage (NVR hard drives): 2-8 TB typical
- Network Attached Storage (NAS): Scalable, 4-20 TB
- Cloud storage: Monthly subscriptions, unlimited retention
Storage Calculation: 1080p camera at 3 Mbps × 24 hours × 30 days = approximately 1 TB monthly.
Step-by-Step Installation Guide
Step 1: Plan Camera Locations
Strategic placement is crucial for surveillance effectiveness. First, identify coverage areas requiring monitoring. Then, ensure cameras mount at 2.5-3 meters height for optimal viewing angles. Additionally, verify power source proximity or plan PoE infrastructure.
Moreover, consider lighting conditions—avoid direct sunlight in camera field of view. Furthermore, ensure network cable can reach from camera to switch/NVR location.
Step 2: Install Network Infrastructure
Begin by running Ethernet cables. First, use cable trunking or conduits for professional appearance. Then, label all cables clearly with camera locations. Additionally, test each cable run with network tester before connecting cameras.
Moreover, install PoE switch or NVR in climate-controlled, secured location. Furthermore, connect switch to main network router and verify connectivity.
Also reference our access point installation guide for comprehensive network coverage planning.
Step 3: Configure Network Settings
Proper network configuration is critical for success. First, decide on IP addressing scheme (static vs DHCP). Then, assign IP addresses outside your main DHCP range to avoid conflicts.
Recommended Configuration:
- Router/Gateway: 192.168.1.1
- Main network: 192.168.1.100-192.168.1.200 (DHCP)
- IP cameras: 192.168.1.201-192.168.1.250 (static)
- NVR: 192.168.1.254
Additionally, configure subnet mask (typically 255.255.255.0) and default gateway (router IP).
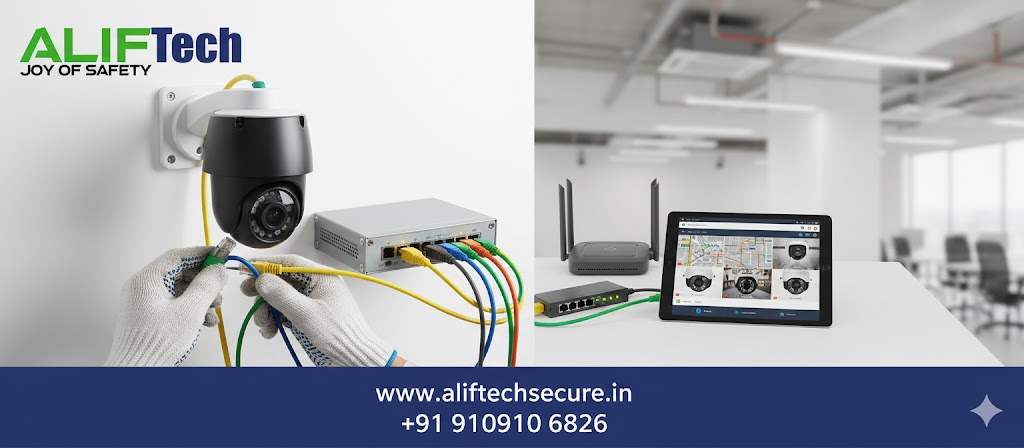
Step 4: Mount and Connect Cameras
Physically install cameras during setup. First, mount cameras securely using provided brackets. Then, adjust viewing angles before tightening. Additionally, apply weatherproof sealing for outdoor installations.
Moreover, connect Ethernet cable to camera PoE port. Furthermore, verify camera powers on (LED indicators). Finally, test camera by accessing default IP address through web browser.
Step 5: Camera Initial Configuration
Access each camera for configuration. First, find camera’s default IP address (check manual or use IP scanner software like Advanced IP Scanner). Then, login using default credentials (admin/admin typically).
Essential Initial Settings:
- Change default admin password immediately
- Assign static IP address
- Configure date/time settings
- Set video resolution and frame rate
- Enable motion detection if desired
Additionally, update camera firmware to latest version. Moreover, configure network settings matching your planned IP scheme.
For security integration, review our video door phone installation guide for complete property protection.
Step 6: Configure NVR or Recording Software
Setup your recording solution. First, add cameras to NVR by entering IP addresses and credentials. Then, configure recording schedules (continuous, motion-triggered, or scheduled). Additionally, set retention policies based on storage capacity.
Moreover, create user accounts with appropriate access levels. Furthermore, enable email alerts for motion detection or system events.
Popular NVR Software:
- Blue Iris (Windows)
- Synology Surveillance Station (NAS)
- ZoneMinder (Open Source)
- Milestone XProtect
Step 7: Setup Remote Access
Enable remote viewing capabilities. First, configure port forwarding on your router for NVR/camera access. Then, setup Dynamic DNS (DDNS) for consistent access despite changing IP addresses.
Port Forwarding Configuration:
- HTTP Port: Forward external 8080 to NVR 80
- RTSP Port: Forward external 554 to NVR 554
Additionally, use VPN for secure remote access instead of direct port forwarding when possible. Moreover, enable HTTPS with SSL certificates for encrypted connections.
Learn about network security best practices for remote access protection.
Step 8: Configure Video Settings
Optimize video quality in your system. First, set appropriate resolution balancing quality vs bandwidth. Then, configure frame rate (15-30 fps typical). Additionally, adjust compression settings (H.264 or H.265 for efficiency).
Moreover, configure video quality profiles for different scenarios:
- Continuous recording: Lower quality, saves storage
- Motion events: Higher quality, better evidence
- Remote viewing: Lower quality, saves bandwidth
Furthermore, setup region of interest (ROI) encoding for better quality in critical areas.
Step 9: Implement Security Measures
Security is paramount for surveillance systems. First, change all default passwords to strong, unique credentials. Then, disable unused features like UPnP and P2P cloud services. Additionally, create separate VLAN for camera network isolation.
Security Checklist:
- ✓ Strong passwords (16+ characters)
- ✓ Firmware updated to latest version
- ✓ VLAN isolation configured
- ✓ Firewall rules restricting camera internet access
- ✓ Regular security audits scheduled
Moreover, disable ONVIF if not needed. Furthermore, implement two-factor authentication where supported.
Reference our comprehensive WiFi security guide for network protection strategies.
Step 10: Test and Verify System
Complete installation with thorough testing. First, verify all cameras stream video smoothly. Then, test recording functionality and playback. Additionally, confirm motion detection triggers properly.
Moreover, test remote access from outside network. Furthermore, verify backup power (UPS) maintains system during outages. Finally, document all configurations including IP addresses, credentials, and settings.
Advanced Configuration Options
VLAN Configuration for Security
VLANs isolate camera traffic for enhanced protection. First, create dedicated VLAN (e.g., VLAN 20) for cameras. Then, configure switch ports for camera VLAN. Additionally, setup routing rules allowing NVR access while blocking camera internet access.
Benefits: Enhanced security, bandwidth management, simplified troubleshooting.
Check VLAN setup guides for detailed configuration.
Quality of Service (QoS)
QoS prioritizes camera traffic on your network. First, identify camera IP addresses or VLAN. Then, configure router/switch QoS rules giving cameras high priority. Additionally, limit bandwidth for non-essential traffic during peak times.
Moreover, prevents video lag during high network usage. Furthermore, ensures consistent recording quality.
Intelligent Video Analytics
Modern surveillance systems support analytics. First, enable motion detection with customizable zones. Then, configure line crossing detection for perimeter monitoring. Additionally, setup facial recognition (if supported).
Moreover, configure tamper detection alerting if camera is moved. Furthermore, setup heat mapping for customer traffic analysis in retail.
Integration with Other Systems
Expand capabilities through integration. First, connect with access control systems triggering recording on door events. Then, integrate with alarm systems for coordinated response. Additionally, link to building management systems.
Moreover, setup smart home integration with Alexa or Google Home. Furthermore, connect to video management systems (VMS) for enterprise-scale management.
Explore our biometric attendance system guide for integrated security solutions.
Bandwidth Optimization Techniques
Video Compression
Optimize bandwidth through compression. First, use H.265 (HEVC) reducing bandwidth by 50% vs H.264. Then, adjust bitrate to balance quality vs bandwidth. Additionally, use variable bitrate (VBR) for efficiency.
Moreover, configure dual streams: high quality for local recording, low quality for remote viewing. Furthermore, this reduces internet bandwidth requirements significantly.
Frame Rate Adjustment
Reduce frame rate for bandwidth savings. First, 15 fps adequate for most scenarios (vs 30 fps). Then, increase to 25-30 fps only for high-motion areas. Additionally, this halves bandwidth and storage requirements.
Resolution Optimization
Balance resolution needs in your system. First, 1080p sufficient for most applications. Then, use 4MP or 4K only where detail is critical. Additionally, this prevents unnecessary bandwidth consumption.
Troubleshooting Common Issues
Cameras Not Detected
When cameras don’t appear on your network, first verify physical connections are secure. Then, check if camera powers on (LED indicators). Additionally, use IP scanner to find camera on network.
Moreover, ensure camera and NVR are on same subnet. Furthermore, verify firewall isn’t blocking camera traffic.
Video Lag or Freezing
Address performance issues in your system. First, check network bandwidth utilization. Then, reduce camera resolution or frame rate. Additionally, upgrade to gigabit switches if using 100 Mbps.
Moreover, check for faulty cables causing packet loss. Furthermore, verify PoE switch has adequate power budget.
Cannot Access Remotely
Fix remote access problems. First, verify port forwarding configured correctly. Then, check DDNS updates properly. Additionally, ensure router firewall allows forwarded ports.
Moreover, test from cellular connection (not WiFi) to confirm external access. Furthermore, verify NVR/camera HTTP server is enabled.
Storage Filling Quickly
Manage storage efficiently. First, reduce recording quality or frame rate. Then, shorten retention period. Additionally, enable motion-only recording instead of continuous.
Moreover, upgrade to larger capacity drives. Furthermore, implement automatic deletion of old footage.
Maintenance Best Practices
Regular Tasks
Maintain your surveillance system through scheduled activities:
Weekly: Review recorded footage quality, check camera views haven’t shifted, verify motion detection working.
Monthly: Update firmware if available, review storage utilization, clean camera lenses, test remote access functionality.
Quarterly: Verify all cables and connections secure, review and update passwords, audit user accounts and permissions, test backup/failover systems.
Annually: Professional system inspection, replace aging hard drives proactively, review and update security policies.
Backup Strategies
Protect footage in your surveillance system. First, implement redundant storage (RAID configuration). Then, setup automated cloud backup for critical cameras. Additionally, maintain offline backup of important footage.
Moreover, test backup restoration regularly. Furthermore, document recovery procedures.
Cost Breakdown for Surveillance Systems
Small Home Setup (4 cameras):
- 4× 1080p PoE cameras: ₹12,000-24,000
- 8-port PoE switch: ₹4,000-8,000
- 1 TB storage (NVR or PC): ₹3,000-6,000
- Cables and accessories: ₹2,000-4,000
- Total: ₹21,000-42,000
Medium Business (16 cameras):
- 16× 4MP PoE cameras: ₹80,000-1,60,000
- 16-channel NVR with PoE: ₹35,000-70,000
- 4 TB storage upgrade: ₹8,000-12,000
- 24-port managed switch: ₹15,000-30,000
- Professional installation: ₹15,000-30,000
- Total: ₹1,53,000-3,02,000
Large Enterprise (50+ cameras):
- 50× mixed cameras: ₹3,00,000-6,00,000
- Enterprise NVR/VMS: ₹1,00,000-3,00,000
- Network infrastructure: ₹50,000-1,50,000
- Storage solution (NAS): ₹1,00,000-2,50,000
- Professional design and installation: ₹1,00,000-3,00,000
- Total: ₹6,50,000-16,00,000+
Visit Amazon India IP cameras for current pricing options.
Legal and Privacy Considerations
Ensure your surveillance installation complies with regulations. First, notify employees/residents about surveillance. Then, avoid recording private areas (bathrooms, changing rooms). Additionally, post signage indicating video surveillance.
Moreover, comply with data protection laws regarding footage storage and access. Furthermore, establish clear policies on who can view footage and for what purposes.
Additionally, for rental properties or apartments, verify landlord/society approval before installation.
For comprehensive router selection, read our business router guide for network infrastructure planning.
Conclusion: Successful Camera Network Implementation
Successful surveillance installation requires careful planning, proper configuration, and ongoing maintenance. First, calculate bandwidth and storage requirements accurately. Then, implement security best practices protecting your system. Additionally, optimize settings balancing quality with network resources.
Moreover, networked camera systems offer significant advantages over analog including superior image quality, remote accessibility, intelligent analytics, and easier scalability. Furthermore, proper implementation ensures reliable security coverage for years.
Therefore, follow this guide for professional results. Whether securing a home or business, taking time to configure properly pays dividends through reliable performance and peace of mind. Ultimately, well-executed surveillance forms the foundation of comprehensive security infrastructure.
For complete security solutions, explore our burglar alarm comparison guide and fire alarm systems for integrated protection.
Frequently Asked Questions: Surveillance Camera Installation
Q: What’s the difference between PoE and non-PoE camera installations?
A: PoE (Power over Ethernet) delivers both power and data through single Ethernet cable, simplifying installation. Non-PoE requires separate power adapters at each camera location. Therefore, PoE is strongly recommended for cleaner, more reliable installations.
Q: Can I mix different camera brands in my surveillance system?
A: Yes, most cameras support ONVIF standard ensuring compatibility. However, some advanced features may work only with same-brand NVRs. Therefore, verify ONVIF compliance before mixing brands in your system.
Q: How much bandwidth does a surveillance system consume?
A: Depends on resolution and number of cameras. Typically, 1080p camera uses 2-4 Mbps, 4MP uses 4-8 Mbps, 4K uses 12-20 Mbps. Therefore, calculate total bandwidth multiplying camera count by per-camera usage, then add 20% buffer.
Q: Do I need internet for camera network operation?
A: No, cameras work on local network without internet. However, internet is required for remote viewing from smartphones/computers outside your location. Additionally, cloud storage features need internet connectivity.
Q: What storage capacity do I need for my surveillance system?
A: Calculate based on cameras, resolution, and retention period. Example: 8× 1080p cameras at 3 Mbps, 24/7 recording, 30-day retention needs approximately 8 TB. Therefore, plan storage based on your specific requirements.
Q: Is WiFi reliable for camera installations?
A: Wired Ethernet is always more reliable. However, WiFi works for small installations with 2-4 cameras. Additionally, ensure strong signal strength at camera locations. Moreover, WiFi cameras consume more power reducing battery life.
Q: How do I access cameras remotely after installation?
A: Three methods: port forwarding (configure router to forward ports to NVR), VPN (create secure tunnel to local network), or cloud service (camera manufacturer’s cloud platform). VPN offers best security for remote access.
Q: Can I install cameras myself or need professionals?
A: Simple residential installations (4-8 cameras) are DIY-friendly with this guide. However, larger installations (15+ cameras) or complex network configurations benefit from professional installation ensuring optimal performance and security.
