PoE Switch Installation and Benefits: Complete Guide
Power over Ethernet (PoE) technology has revolutionized network installations by delivering both data and power through a single Ethernet cable. This guide explains PoE switch benefits, installation steps, and best practices for homes, offices, and enterprise environments.
What is a PoE Switch?
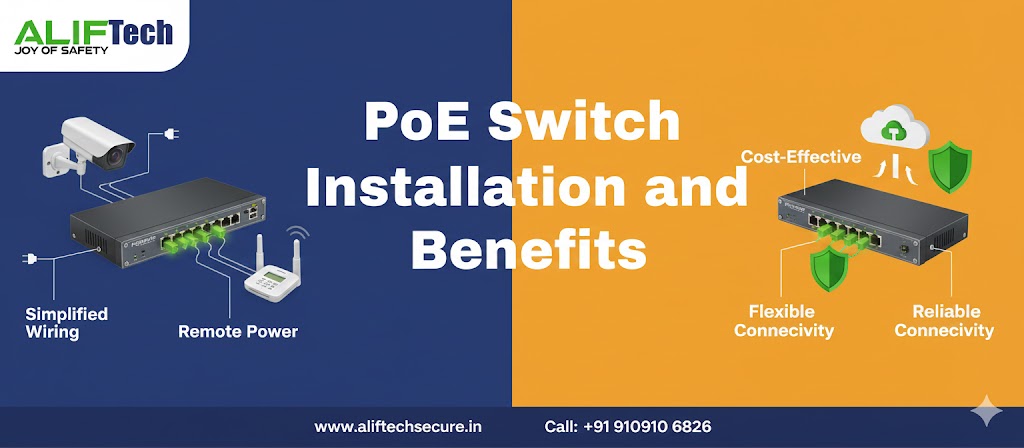
A PoE switch is a network device that sends electrical power alongside data over standard Ethernet cables to connected devices. As a result, this removes the need for separate power adapters, making installation of IP cameras, wireless access points, VoIP phones, and other network devices much easier.
Furthermore, instead of running power cables to each device location, a single Ethernet cable from the PoE switch handles both networking and power delivery up to 100 meters away.
PoE Standards Explained
IEEE 802.3af (PoE): This standard delivers up to 15.4W per port, making it suitable for basic devices like VoIP phones, simple IP cameras, and basic wireless access points.
IEEE 802.3at (PoE+): In contrast, this provides up to 30W per port, supporting PTZ cameras, dual-band access points, video phones, and advanced sensors.
IEEE 802.3bt (PoE++ or Ultra PoE): Meanwhile, this supplies up to 60W (Type 3) or 100W (Type 4) per port for high-power devices like multi-radio access points, LED lighting, laptop charging, and high-end PTZ cameras.
Therefore, choose your switch based on device power requirements. Most modern IP cameras need 12-25W (PoE+), while enterprise access points may require 30-60W (PoE++).
Key Benefits of PoE Switches
Cost Savings
Reduced Installation Costs: First, you can eliminate electrician fees for power outlet installation at every device location. Additionally, running Ethernet cables costs 60-70% less than running AC power lines, especially for ceiling-mounted devices.
Lower Equipment Costs: Furthermore, there’s no need for individual power adapters (₹500-2,000 each). For example, for 20 devices, you save ₹10,000-40,000 on adapters alone.
Flexible Device Placement: Moreover, you can install devices anywhere within 100 meters of the switch without worrying about nearby power outlets. This is perfect for ceiling-mounted cameras or access points in hallways.
Simplified Installation
Single Cable Solution: One Ethernet cable delivers both network connectivity and power. Consequently, this simplifies cable management, reduces installation time by 40-50%, and creates cleaner, more professional-looking installations.
Faster Deployment: As a result, IT staff can install and configure devices without coordinating with electricians. Therefore, you can deploy new cameras or access points in minutes rather than days.
Easy Troubleshooting: Additionally, fewer cables mean simpler troubleshooting. Instead of checking multiple connections, you only need to check one connection instead of separate network and power issues.
Enhanced Reliability
Centralized Power Management: All devices power from the PoE switch, which can connect to a UPS (Uninterruptible Power Supply). During power outages, all network devices remain operational as long as the UPS runs.
Remote Power Cycling: Reboot frozen devices remotely through switch management interface without physical access. This saves truck rolls for remote locations or ceiling-mounted equipment.
Intelligent Power Allocation: Modern managed switches automatically detect device power needs and allocate accordingly, preventing overload while maximizing port utilization.
Safety and Compliance
Low Voltage Operation: PoE operates at safe low voltages (typically 48V DC), reducing electrical hazards and eliminating high-voltage wiring requirements.
Automatic Detection: PoE switches detect whether connected devices support PoE before supplying power, preventing damage to non-PoE equipment.
Standards Compliance: IEEE-compliant switches ensure compatibility across different device manufacturers, protecting your investment.
Types of PoE Switches
Unmanaged PoE Switches
Plug-and-play devices requiring no configuration. Simply connect devices and they work automatically. Best for home users, small offices (under 10 devices), and simple deployments where basic connectivity suffices.
Pros: Affordable (₹3,000-12,000 for 8-port), zero configuration needed, and reliable for basic needs.
Cons: No advanced features, limited troubleshooting capabilities, and no remote management.
Managed PoE Switches
Offer full configuration control through web interface or command line. Features include VLAN support for network segmentation, QoS (Quality of Service) for traffic prioritization, port mirroring for monitoring, remote management and monitoring, and detailed statistics and reporting.
Best for: Medium to large businesses, deployments with 15+ devices, environments requiring network security and segmentation, and installations needing remote management.
Price Range: ₹15,000-₹2,00,000+ depending on port count and features.
Smart/Web-Managed PoE Switches
Middle ground between unmanaged and fully managed switches. Offer basic management features like VLAN configuration and QoS through simple web interface at lower cost than fully managed switches.
Ideal for: Small businesses growing beyond unmanaged switches, installations requiring basic VLANs and monitoring, and budget-conscious deployments needing some management capability.
Installation Steps
Step 1: Plan Your Network
First, calculate total power requirements by listing all devices with their power needs (check device specifications). Then, add 20% buffer for future expansion and peak loads. Finally, ensure your chosen switch’s power budget exceeds this total.
Example calculation: 8 IP cameras (15W each) + 4 access points (25W each) = 120W + 100W = 220W. Subsequently, add 20% buffer = 264W. Therefore, choose switch with 300W+ power budget.
Next, determine required port count including spares for future growth. Additionally, plan physical switch location in a climate-controlled, secured area with proper ventilation.
Step 2: Choose the Right Switch
Select based on device requirements (PoE, PoE+, or PoE++), number of ports needed (plus 20-30% spare capacity), managed vs unmanaged based on your network needs, and power budget covering all devices plus buffer.
Popular brands: Cisco (enterprise-grade, highest reliability), Ubiquiti UniFi (excellent value, cloud-managed), TP-Link (budget-friendly, good performance), Netgear (small business focused), and D-Link (wide range of options).
Step 3: Prepare Installation Location
First, mount the switch in a network rack or on wall using provided brackets. Additionally, ensure adequate ventilation—maintain 10cm clearance on all sides for airflow. Furthermore, keep away from heat sources, direct sunlight, and moisture.
Moreover, install in a secured location to prevent unauthorized access. For critical installations, connect switch to UPS for backup power ensuring continuous operation during outages.
Step 4: Connect the Switch
Initially, connect power cable to switch and electrical outlet (or UPS). Then, for stacked or managed switches, connect uplink ports to your core network switch or router using appropriate Ethernet cables (Cat6 or Cat6a for gigabit speeds).
Afterward, wait for switch to boot completely (typically 1-2 minutes) and verify power LED indicators show normal operation.
Step 5: Connect PoE Devices
First, run Ethernet cables from PoE switch ports to device locations. However, use Cat5e minimum, Cat6 or Cat6a recommended for future-proofing and better performance. Remember that maximum cable length is 100 meters for full PoE functionality.
Next, connect devices and verify they power on automatically. Typically, most PoE devices show LED indicators when receiving power. Similarly, check switch port LEDs to confirm connection and PoE status.
Finally, label all cables clearly at both ends with device names and port numbers for easy troubleshooting later.
Step 6: Configure Switch Settings (Managed Switches)
First, access switch management interface via web browser using default IP address from manual. Then, change default admin credentials immediately for security.
Subsequently, configure essential settings: assign static IP address to switch for reliable access, setup VLANs to segment network traffic (cameras, access points, corporate), enable QoS to prioritize critical traffic like VoIP, and configure port settings including speed/duplex and PoE priority.
Additionally, enable SNMP monitoring if integrating with network management systems. Finally, setup email alerts for power budget warnings or port failures.
Step 7: Test and Verify
First, verify all devices receive power and network connectivity. Then, check switch power budget usage in management interface—ensure you’re not exceeding capacity.
Next, test device functionality (cameras recording, access points broadcasting, phones making calls). Additionally, verify network speeds meet expectations using tools like iperf.
Finally, document port assignments, power usage per port, and VLAN configurations for future reference.
Best Practices
Power Budget Management
First and foremost, never exceed 80% of switch’s total power budget. This provides headroom for power fluctuations and prevents overload situations. Moreover, prioritize critical devices if budget is tight—most managed switches allow setting port priority for power allocation.
Additionally, monitor power consumption regularly and plan upgrades before reaching capacity limits.
Cable Quality Matters
Always use quality Ethernet cables rated for PoE. In fact, cheap cables have higher resistance causing power loss over distance. Therefore, for runs over 50 meters, Cat6 or Cat6a ensures reliable power delivery.
Furthermore, test cables before permanent installation to avoid troubleshooting after ceiling tiles are sealed or walls closed.
Environmental Considerations
Generally, maintain operating temperature between 0°C and 40°C for most switches. However, industrial-grade switches handle -40°C to 75°C for harsh environments.
Moreover, ensure adequate cooling—overheating reduces lifespan and causes unexpected failures. Therefore, use rack-mounted fans in enclosed cabinets.
Security Measures
First, change default passwords immediately. Then, enable 802.1X port authentication where supported. Additionally, disable unused ports to prevent unauthorized access. Furthermore, implement VLANs to isolate different device types and regularly update switch firmware for security patches.
Regular Maintenance
First, check power consumption monthly to identify trends. Then, clean air vents quarterly to prevent dust buildup. Additionally, update firmware semi-annually or when security updates release. Furthermore, review logs regularly for errors or warnings, and test UPS backup quarterly to ensure functionality during outages.
Common Issues and Solutions
Device Not Powering On: First, verify cable is good (test with known working cable), then check port LED—solid means connection, blinking means PoE active. Additionally, ensure power budget isn’t exceeded (check switch display), and try different port to isolate switch vs device issue.
Intermittent Power: Initially, check cable quality and length (under 100m), then verify connections are secure at both ends. Furthermore, reduce switch load if near power budget limit, and ensure switch has adequate cooling.
Network Speed Issues: First, verify cables are Cat5e or better, then check for cable damage or improper termination. Moreover, ensure switch supports gigabit speeds on all ports, and review QoS settings if certain traffic prioritized.
PoE Not Detected: Initially, confirm device actually supports PoE (check specifications), then verify switch port has PoE enabled. Additionally, try manual PoE mode if auto-detection fails, and update switch firmware if persistent issues.
Cost Breakdown
8-Port Unmanaged PoE Switch: ₹3,000-8,000 (basic home/small office use)
16-Port Managed PoE+ Switch: ₹15,000-35,000 (small to medium business)
24-Port Managed PoE+ Switch: ₹25,000-70,000 (medium business, high reliability)
48-Port Managed PoE++ Switch: ₹80,000-2,00,000+ (enterprise, high power requirements)
Additional Costs: Cat6 cables (₹30-50 per meter), professional installation (₹2,000-5,000), UPS backup (₹8,000-50,000 depending on capacity), and network rack/cabinet if needed (₹5,000-25,000).
Use Cases
Security Installations: Power multiple IP cameras from central location without individual power supplies. Add cameras easily without electrical work.
Wireless Networks: Deploy access points throughout building without power outlets at each location. Centralized power enables network-wide UPS backup.
VoIP Phone Systems: Install desk phones anywhere without power adapters cluttering workstations. Phones remain operational during power outages with UPS.
Building Automation: Power IoT sensors, door controllers, lighting systems, and environmental monitors through single infrastructure.
Digital Signage: Deploy displays in various locations powered via Ethernet, simplifying installation in retail or corporate environments.
Conclusion
PoE switches simplify network installations while reducing costs and improving reliability. They’re essential for modern IP camera systems, wireless networks, and VoIP deployments. Choose the right switch based on device power requirements and port count, install with proper planning and cable management, and maintain regularly for optimal performance. The initial investment in quality PoE infrastructure pays dividends through simplified installations, reduced maintenance, and improved system reliability for years to come.
Frequently Asked Questions
Q: Can I damage devices by connecting them to PoE switch?
A: No. IEEE-compliant PoE switches detect whether devices support PoE before supplying power. Non-PoE devices receive only data and remain safe. However, always use quality switches from reputable manufacturers.
Q: How far can PoE deliver power?
A: Maximum 100 meters (328 feet) over Ethernet cable. Beyond this, power loss becomes significant and devices may not function. Use PoE extenders or additional switches for longer distances.
Q: What’s the difference between PoE and PoE+?
A: PoE (802.3af) delivers up to 15.4W per port, while PoE+ (802.3at) provides up to 30W. Use PoE+ for high-power devices like PTZ cameras, dual-band access points, and video phones.
Q: Can I mix PoE and non-PoE devices on same switch?
A: Yes. PoE switches work with both PoE and non-PoE devices simultaneously. Non-PoE devices simply receive data without power. This flexibility allows mixed deployments.
Q: Do I need special Ethernet cables for PoE?
A: Standard Cat5e works, but Cat6 or Cat6a recommended for better performance, especially for longer runs or PoE++. Ensure cables are quality-rated for PoE to minimize power loss.
Q: How do I calculate power budget needed?
A: Add up maximum power consumption of all devices, then add 20-30% buffer. Example: 10 cameras at 15W each = 150W, plus 30% = 195W minimum switch power budget.
Q: Will PoE work during internet outages?
A: Yes. PoE delivers power regardless of internet connectivity. Devices remain powered but may lose cloud features. Local recording and basic functions continue working.
Q: Can PoE switches be powered by UPS?
A: Yes, and highly recommended. Connecting PoE switch to UPS ensures all powered devices (cameras, access points, phones) remain operational during power outages, maintaining security and communications.
