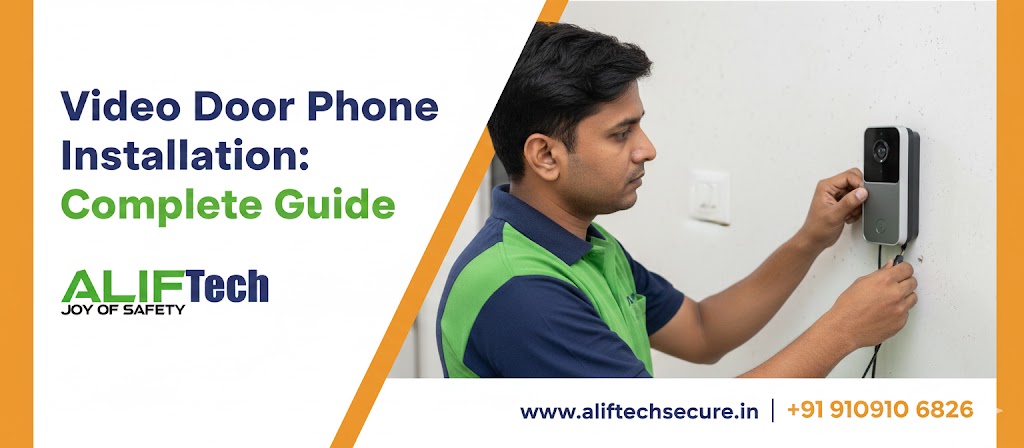
Video Door Phone Installation: Complete Guide
Video door phones have become essential for modern home security, allowing you to see and communicate with visitors before opening the door. Whether you’re installing in a standalone home or an apartment complex, this guide covers everything from choosing the right system to complete installation and troubleshooting.
What is a Video Door Phone?
A video door phone (or video intercom) consists of an outdoor camera unit at your entrance and an indoor monitor inside your home. When someone presses the doorbell, you see live video of the visitor and communicate through two-way audio. Advanced systems offer features like remote unlocking, mobile app integration, and recording capabilities.
Types of Video Door Phone Systems
Wired Video Door Phones
Traditional wired systems connect the outdoor unit to indoor monitor through cables. They offer reliable connectivity with no signal interference, no battery requirements, and superior video quality without compression. However, installation requires running cables through walls and professional help for multi-story buildings.
Best for: Permanent installations, new constructions, apartments with existing intercom infrastructure.
Wireless Video Door Phones
These systems use WiFi or proprietary wireless protocols to communicate between units. They feature easy DIY installation, portability when moving homes, and smartphone integration for remote access. The downside includes dependency on WiFi stability, battery replacements for outdoor units, and potential signal interference.
Best for: Renters, retrofit installations, homes where running cables is difficult.
Smart Video Doorbells
WiFi-enabled doorbells with cloud recording, smartphone apps, motion detection, and smart home integration. They require existing doorbell wiring (or use battery power), need stable WiFi connection, and often come with monthly subscription fees for cloud storage.
Best for: Tech-savvy users, smart home enthusiasts, those wanting remote monitoring.
Multi-Unit Apartment Systems
Designed for apartment buildings with multiple indoor stations connected to common outdoor panels. They feature individual unit calling, access control integration, and centralized visitor management. Installation requires professional setup and building-wide coordination.
Best for: Apartment complexes, gated communities, commercial buildings.
Essential Features to Consider
Video Quality: Minimum 720p resolution recommended; 1080p ideal for clear facial recognition. Night vision with IR LEDs ensures visibility in low-light conditions (at least 3-5 meters range).
Two-Way Audio: Clear communication is crucial. Look for noise cancellation and echo reduction features. Test audio quality before final installation.
Unlocking Capability: Electric door lock integration allows remote access for trusted visitors. Ensure compatibility with your existing lock or plan to upgrade.
Recording Options: Local storage (SD card up to 128GB) or cloud storage. Consider recording continuous video or motion-triggered clips only to save storage space.
Weather Resistance: Outdoor units need IP65 rating minimum for Indian weather conditions. IP66 or IP67 better for areas with heavy monsoons.
Power Supply: Choose between AC powered (stable, no battery worries), battery powered (flexible placement but requires charging), or PoE powered (single cable for power and data).
Installation Requirements
Tools Needed
Basic toolkit including screwdriver set (Phillips and flathead), drill machine with masonry bits, wire stripper and cutter, multimeter for testing, cable clips and cable ties, silicone sealant for weatherproofing, and pencil for marking.
Materials Required
Video door phone kit (outdoor and indoor units), cables (if wired system—typically 4-6 core cable), mounting bracket and screws, power adapter or PoE injector, electric door lock (if adding remote unlock), junction box for cable connections, and cable conduit or trunking.
Step-by-Step Installation Guide
Step 1: Choose Installation Location
Select a location for the outdoor unit at chest to eye level (approximately 1.5-1.7 meters) with clear view of visitor’s face. Ensure weather protection (covered porch ideal) and proximity to power source if AC powered. Position away from direct sunlight to prevent glare and near your WiFi router for wireless systems (within 10-15 meters).
For indoor monitor, install in a convenient location like living room or bedroom at comfortable viewing height (1.4-1.5 meters). Ensure the location allows easy cable routing from outdoor unit.
Step 2: Install Outdoor Unit
Mark drilling points using the mounting bracket as template. Drill holes using appropriate masonry bit (typically 6-8mm). Insert wall anchors firmly and attach mounting bracket securely. Connect wires before mounting the outdoor unit if using wired system.
Apply silicone sealant around cable entry points to prevent water ingress during monsoons. Mount the outdoor camera unit onto bracket and secure with provided screws. Ensure the camera angle captures visitor’s face clearly.
Step 3: Run Cables (For Wired Systems)
Plan the cable route from outdoor to indoor unit avoiding electrical wiring to prevent interference. Use wall chasing for concealed installation or cable trunking for surface mounting. For multi-story buildings, run cables through existing conduits or along exterior walls.
Use 4-core cable minimum (power, audio, video, ground) or 6-core for systems with additional features. Leave 15-20cm extra cable at both ends for connections. Secure cables with clips every 30-40cm to prevent sagging.
Step 4: Install Indoor Monitor
Mount the indoor monitor bracket at comfortable viewing height. Connect cables following color coding: red (positive power), black (negative power), yellow (video signal), white (audio). Use terminal blocks for secure connections.
For wireless systems, simply plug in the monitor and pair with outdoor unit following manufacturer’s instructions. Most systems use button-press pairing within first 30 seconds of powering on.
Step 5: Power Connection
For AC-powered systems, connect the power adapter to indoor monitor. Ensure voltage matches specifications (typically 12V DC or 24V AC). For PoE systems, connect to PoE switch or injector. Battery-powered units need full charging before first use (4-6 hours typically).
Test power indicator lights to confirm proper connection. Indoor monitor should light up when powered correctly.
Step 6: System Configuration
Access settings menu on indoor monitor using provided controls. Set brightness and contrast for optimal viewing, adjust volume for doorbell chime and intercom, configure motion detection sensitivity (if available), and set recording preferences (continuous or event-based).
For WiFi systems, connect to your home network through settings menu. Enter WiFi password and wait for confirmation. Download smartphone app and create account for remote access features.
Step 7: Test All Functions
Press doorbell button and verify chime sounds and video displays. Test two-way audio quality—speak clearly and check for delays or distortion. If equipped with unlock feature, test electric lock operation. Verify night vision activates in low light and check motion detection alerts trigger correctly.
Test from different angles to ensure camera coverage is adequate. Adjust camera angle if needed to capture visitor faces properly.
Wireless System Setup
Wireless systems require additional configuration steps beyond basic installation. Connect outdoor unit to WiFi following app instructions—use 2.4 GHz band as outdoor units typically don’t support 5 GHz. Position unit within 10-15 meters of router for stable connection.
Enable push notifications for doorbell press and motion detection events. Configure privacy zones to exclude public areas from recording. Set up user accounts for family members with appropriate access levels. Link to smart home systems like Alexa or Google Home if supported.
Electric Lock Integration
To add remote unlock capability, install electric strike lock or electromagnetic lock compatible with your door type. Connect lock to video door phone relay output (typically labeled “lock” or “relay”). Configure unlock duration (3-5 seconds recommended).
Test lock operation multiple times before final installation. Ensure mechanical fail-safe—lock should open during power failures for safety. Consider battery backup for lock system.
Troubleshooting Common Issues
No Video Display: Check cable connections at both ends, verify power supply is adequate (12V/2A minimum), test cable continuity with multimeter, and ensure camera lens is not obstructed.
Poor Video Quality: Clean camera lens with soft cloth, adjust camera angle to avoid direct sunlight, check cable length (maximum 100 meters for standard cables), and upgrade to shielded cables if interference is suspected.
Audio Problems: Check microphone and speaker connections, reduce volume if echo occurs, ensure cables aren’t running parallel to AC power lines, and update firmware if available.
WiFi Connectivity Issues: Move router closer or use WiFi extender, switch to less congested WiFi channel, ensure 2.4 GHz band is enabled, and check router firewall settings aren’t blocking device.
Frequent Disconnections: Replace weak batteries in wireless units, check power adapter output voltage, verify cable connections are secure, and consider power backup for wired systems.
Maintenance Tips
Clean camera lens monthly with microfiber cloth to maintain clear video. Check cable connections quarterly, especially after monsoons. Test all functions (video, audio, unlock) monthly to catch issues early. Update firmware when available for security and features.
For battery-powered units, recharge when indicator shows below 20%. Replace backup batteries annually in wired systems. Check weatherproofing seals and reapply silicone sealant if cracks appear.
Cost Breakdown
Basic Wired Systems: ₹3,000-8,000 (monitor + outdoor unit) Advanced Wired Systems: ₹8,000-20,000 (larger screen, recording, better video quality) Wireless/Smart Systems: ₹5,000-25,000 (depending on features and brand) Multi-Unit Systems: ₹15,000-50,000+ per unit (depends on building size)
Installation Costs: DIY wireless (₹0), DIY wired (₹500-1,500 for materials), professional installation (₹1,500-5,000 depending on complexity).
Additional Costs: Electric lock (₹2,000-8,000), cloud storage subscription (₹200-800/month), extended cable runs (₹30-50/meter).
Safety and Legal Considerations
Ensure outdoor camera angle respects neighbor privacy—don’t capture adjacent properties or public walkways unnecessarily. Install “video surveillance” signage where required by local regulations. Comply with data protection laws regarding recording and storage.
For apartment installations, get building management approval before installation. Verify electrical work complies with local codes. Use licensed electricians for AC power connections if unsure.
Conclusion
Video door phone installation enhances security and convenience significantly. Wireless systems offer easy DIY installation perfect for most homes, while wired systems provide reliability for permanent installations. Focus on proper placement, secure connections, and weatherproofing for Indian conditions. Test thoroughly before finalizing installation and maintain regularly for long-term performance. Whether protecting a single home or entire apartment complex, proper installation ensures your video door phone serves reliably for years.
Frequently Asked Questions
Q: Can I install a video door phone myself?
A: Yes, wireless systems are DIY-friendly and take 1-2 hours. Wired systems require basic electrical knowledge and may need professional help for multi-story installations or complex cable routing.
Q: What cable is used for wired video door phones?
A: Use 4-core or 6-core shielded cable (0.5mm² to 0.75mm²). Standard intercom cable or CCTV cable works well. Maximum recommended length is 100 meters without signal boosters.
Q: Do video door phones work during power cuts?
A: Wired systems need backup battery to function during outages (typically lasts 4-6 hours). Battery-powered wireless units continue working as they don’t rely on mains power.
Q: Can I connect video door phone to my smartphone?
A: Yes, if it’s a WiFi-enabled smart video doorbell or wireless system with app support. Traditional wired systems generally don’t have smartphone connectivity unless specifically designed for it.
Q: What is the range of wireless video door phones?
A: Typically 100-300 meters in open space, but walls and obstacles reduce this to 20-50 meters in real-world conditions. WiFi-based systems depend on your router’s coverage.
Q: How do I weatherproof my outdoor unit?
A: Choose IP65+ rated units, install under covered area if possible, apply silicone sealant around all cable entries and mounting screws, and ensure proper drainage to prevent water accumulation.
Q: Can video door phones record visitors?
A: Many modern systems support recording via SD card (local) or cloud storage. Check if recording is continuous or motion-triggered. Note: some models require subscription for cloud recording.
Q: Will video door phone work with existing doorbell?
A: Some smart video doorbells can use existing doorbell wiring (if voltage matches). Traditional video door phones typically require separate installation and don’t integrate with old doorbells.
